
How to draw fire.
Have you ever marveled at the mesmerizing flicker of flames in digital artwork and wondered how artists create such captivating fire effects? Whether you’re a budding digital artist or a seasoned pro looking to ignite your skills, mastering the art of drawing fire digitally can add a whole new dimension to your creations. Fire is not just an element; it’s a dynamic, ever-changing force that can breathe life into your artwork.
At Artistic Trio Studio, we’ve spent countless hours perfecting our digital fire-drawing techniques, and we’re excited to share our knowledge with you. From the basics of understanding fire’s behavior to advanced techniques for creating ultra-realistic flames, this guide will walk you through everything you need to know. Did you know that fire actually has a color spectrum beyond the typical reds and oranges? We’ll explore this and many other fascinating aspects of digital fire art.
In this comprehensive tutorial, we’ll cover the essential tools and software you’ll need, provide a step-by-step guide to drawing fire digitally, and reveal some advanced techniques to make your fire artwork truly ablaze. Whether you’re looking to add a subtle warm glow or a raging inferno to your digital paintings, we’ve got you covered. So, grab your stylus, and let’s set your digital canvas ablaze with creativity!
Understanding the Basics of Fire
Fire is one of the most captivating elements to depict in digital art, but it can also be one of the most challenging. To create realistic and dynamic fire in your artwork, it’s essential to understand its fundamental characteristics. Let’s discuss the basics of fire and explore how we can bring this elemental force to life on our digital canvases.
The Anatomy of Fire
At its core, fire is a chemical reaction that produces heat and light. To accurately represent fire in your digital art, it’s crucial to understand its structure:
- The core: This is the hottest part of the flame, usually appearing white or light blue.
- The body: The main part of the flame, typically yellow or orange.
- The outer edge: The cooler part of the flame, often appearing red or dark orange.
- The base: Where the fire meets its fuel source, usually darker in color.
When drawing fire, consider these layers and how they interact with each other. The core should be the brightest, gradually transitioning to cooler colors at the edges. This layered approach will give your fire depth and realism.
Color Theory and Fire
Color plays a vital role in creating convincing fire in your digital artwork. The colors of fire can vary depending on factors such as temperature and fuel source. Generally, fire colors range from cool blues and whites to warm yellows, oranges, and reds. Here’s a basic color guide:
- White/Light Blue: Hottest part of the flame (1800°F to 2400°F).
- Yellow: Very hot (1700°F to 2200°F).
- Orange: Hot (1300°F to 1800°F).
- Red: Cooler flames (900°F to 1300°F).
- Dark Red: The coolest visible part of the flame (700°F to 950°F).
Experiment with these colors and their various shades to create depth and temperature variations in your fire depictions. Remember, digital art allows us to play with the color opacity and blending modes, which can be particularly effective in creating realistic fire effects.
The Importance of Movement In Fire Depiction
Fire is never static; it’s constantly in motion, flickering and dancing. Capturing this movement is key to creating believable fire in your digital art. Here are some tips to convey movement:
- Use curved, upward-flowing lines to represent the rising heat.
- Create wisps and tendrils at the edges of the flame.
- Vary the shape and size of your flame elements.
- Consider the environment: Is there wind? What’s the fuel source?
In digital art, we have the advantage of using tools like smudge brushes or liquify filters to create fluid, organic shapes that mimic the unpredictable nature of fire. Don’t be afraid to experiment with these tools to achieve the desired effect.
As you practice drawing fire, remember that observation is key. Study real fire or reference photos to understand how it behaves in different situations. Pay attention to how light interacts with smoke and surrounding objects, as these details can add that extra level of realism to your artwork.
By mastering these fundamental aspects of fire – its anatomy, color theory, and movement – you’ll be well on your way to creating stunning fire effects in your digital art. Remember, like any skill, it takes practice to perfect. So keep experimenting, and don’t be discouraged if your first attempts don’t look exactly as you imagined. With time and patience, you’ll be creating fiery masterpieces that will truly ignite your digital art portfolio.
Essential Tools and Software for Digital Fire Art
When it comes to creating stunning digital fire art, having the right tools and software at your disposal is crucial. As artists who’ve spent countless hours perfecting our craft, we’ve discovered that the proper setup can make all the difference in bringing your fiery visions to life. Let’s explore the essential elements you’ll need to get started on your project to mastering digital fire art.
Recommended Digital Art Software
Choosing the right software is the foundation of your digital fire art creation. While there are numerous options available, some stand out for their fire-specific features and overall versatility:
- Adobe Photoshop: An industry standard, Photoshop offers a wide range of brushes and effects perfect for fire creation.
- Corel Painter: Known for its natural media brushes, Painter excels in creating realistic fire textures.
- Procreate: For iPad users, Procreate provides an intuitive interface and powerful brush engine ideal for fire illustrations.
- Krita: This free, open-source software is packed with features that rival paid alternatives, including customizable brush engines.
Each of these programs has its strengths, so we recommend experimenting to find the one that best suits your workflow and style. We have written helpful tutorials for each of these programs.
- How to Add Photoshop Textures to Your Digital Art
- Best Procreate Tips & Tricks for Beginners
- How to Master Corel Painter: Creating Stunning Digital Art
- Krita for Animation: Easy Tutorial
- How to Use a Digital Sketchbook Tablet
- How to Use Clip Studio Paint for Your Digital Artwork
Essential Brushes and Tools
The key to creating convincing digital fire lies in using the right brushes and tools. Here are some must-haves:
- Flame brushes: Look for brushes that mimic the organic, flickering nature of flames.
- Smoke brushes: These help add depth and realism to your fire compositions.
- Glow and light effects: Tools that create luminosity are essential for capturing fire’s radiant quality.
- Blending tools: Soft brushes or smudge tools help create smooth transitions between flame colors.
- Layer blending modes: Experiment with modes like “Screen,” “Overlay,” and “Color Dodge” to enhance your fire’s vibrancy.
Many software packages come with pre-installed fire-specific brushes but don’t hesitate to explore custom brush sets created by other artists. These can often provide unique textures and effects that elevate your work.
Hardware Considerations for Digital Fire Drawing
While software and brushes are important, the hardware you use can significantly impact your ability to create detailed and dynamic fire art. Consider the following:
- Drawing tablet: A pressure-sensitive tablet is almost essential for creating natural-looking fire strokes. Brands like Wacom, Huion, and XP-Pen offer a range of options for different budgets.
- Stylus: Look for a stylus with good pressure sensitivity and tilt recognition to achieve varied line weights and textures.
- Computer specs: Fire effects can be resource-intensive. Ensure your computer has sufficient RAM and a capable graphics card to handle complex compositions without lag.
- Monitor: A color-accurate display is crucial for capturing the vibrant hues of fire. Consider investing in a monitor with good color gamut coverage.
Remember, while having top-of-the-line equipment can be beneficial, it’s not absolutely necessary to create an impressive fire art. Many artists produce stunning work with modest setups. The most important factor is your creativity and willingness to practice and experiment.
As you begin on your digital fire art projects, don’t be afraid to try different combinations of software, brushes, and hardware. What works best for one artist may not be ideal for another. The key is to find a setup that feels comfortable and allows you to express your fiery creativity freely.
Step-by-Step Guide to Drawing Fire Digitally
Creating realistic fire in digital art can be a challenging yet rewarding process. Let’s discuss a step-by-step guide that will help you bring your fiery creations to life.
Setting Up Your Canvas and Background
Begin by selecting an appropriate canvas size for your artwork. Consider the intended use of your fire illustration – whether it’s for a larger scene or a standalone piece. Choose a dark background color, as fire tends to stand out against darker environments. A deep blue or black works well, but feel free to experiment with other dark hues that complement your artistic vision.
Creating the Base Shape of the Fire
Start with a basic flame shape using a large, soft brush. Focus on creating a fluid, organic form that tapers towards the top. Remember, fire is dynamic and unpredictable, so avoid perfectly symmetrical shapes. Instead, aim for a natural, flowing silhouette that suggests movement and energy.
Adding Color and Gradients
Fire is rarely a single color, so incorporate a range of warm hues. Begin with a bright yellow core, transitioning to orange and then deep red at the edges. Use gradient tools or layer blending modes to create smooth color transitions. Don’t be afraid to add touches of blue or white to the hottest parts of the flame for added realism.
Incorporating Details and Texture
To bring your fire to life, add intricate details and textures. Use smaller brushes to create wisps and tendrils of flame reaching outwards. Incorporate smoke elements with soft, grey brushstrokes around the edges of the fire. Experiment with custom brushes or texture overlays to add a sense of crackling energy to your flames.
Enhancing the Fire with Lighting Effects
Lighting is crucial for creating a convincing fire effect. Add a soft glow around the flames using a large, low-opacity brush with a light yellow or orange color. Create highlights on nearby objects to suggest the fire is illuminating its surroundings. Don’t forget to add some subtle shadows at the base of the flames for added depth.
As you work through these steps, remember that practice makes perfect. We’ve found that experimenting with different brush settings and layer styles can lead to unique and stunning results. Don’t be discouraged if your first attempts don’t meet your expectations – even experienced digital artists continually refine their techniques.
One helpful tip is to study reference images of real fires. Observe how the flames move, the way colors blend, and how light interacts with the environment. This observation will greatly inform your digital creations and help you capture the essence of fire in your artwork.
Remember, digital art allows for endless experimentation and adjustment. Take advantage of layers and non-destructive editing techniques to refine your fire illustration. You can always go back and make changes or try different approaches until you achieve the desired effect.
As you become more comfortable with these techniques, you’ll develop your own style and preferences for drawing digital fire. Keep pushing your boundaries and exploring new methods – that’s the beauty of digital art! With time and practice, you’ll be creating stunning, dynamic fire illustrations that bring warmth and energy to your digital creations.
Advanced Techniques for Realistic Fire Artwork
As digital artists, we’re always striving to create more realistic and dynamic fire effects in our artwork. Let’s explore some advanced techniques that will help you take your fire illustrations to the next level.
Simulating Smoke and Embers
To create truly believable fire, it’s essential to incorporate smoke and embers into your artwork. Smoke adds depth and atmosphere, while embers bring a sense of energy and movement.
For smoke, start with a soft brush and use varying shades of gray. Create wispy, irregular shapes that flow upward from the base of your fire. Remember, smoke tends to be more opaque near the fire source and becomes more transparent as it rises and dissipates.
Embers can be added using a small, hard brush or even a pencil tool. Scatter tiny orange and yellow dots around the flames, concentrating them near the base and decreasing their frequency as you move outward. For added realism, use a motion blur filter on some of the embers to simulate movement.
Creating Different Types of Fire
Different fire sources require unique approaches. Let’s look at three common types:
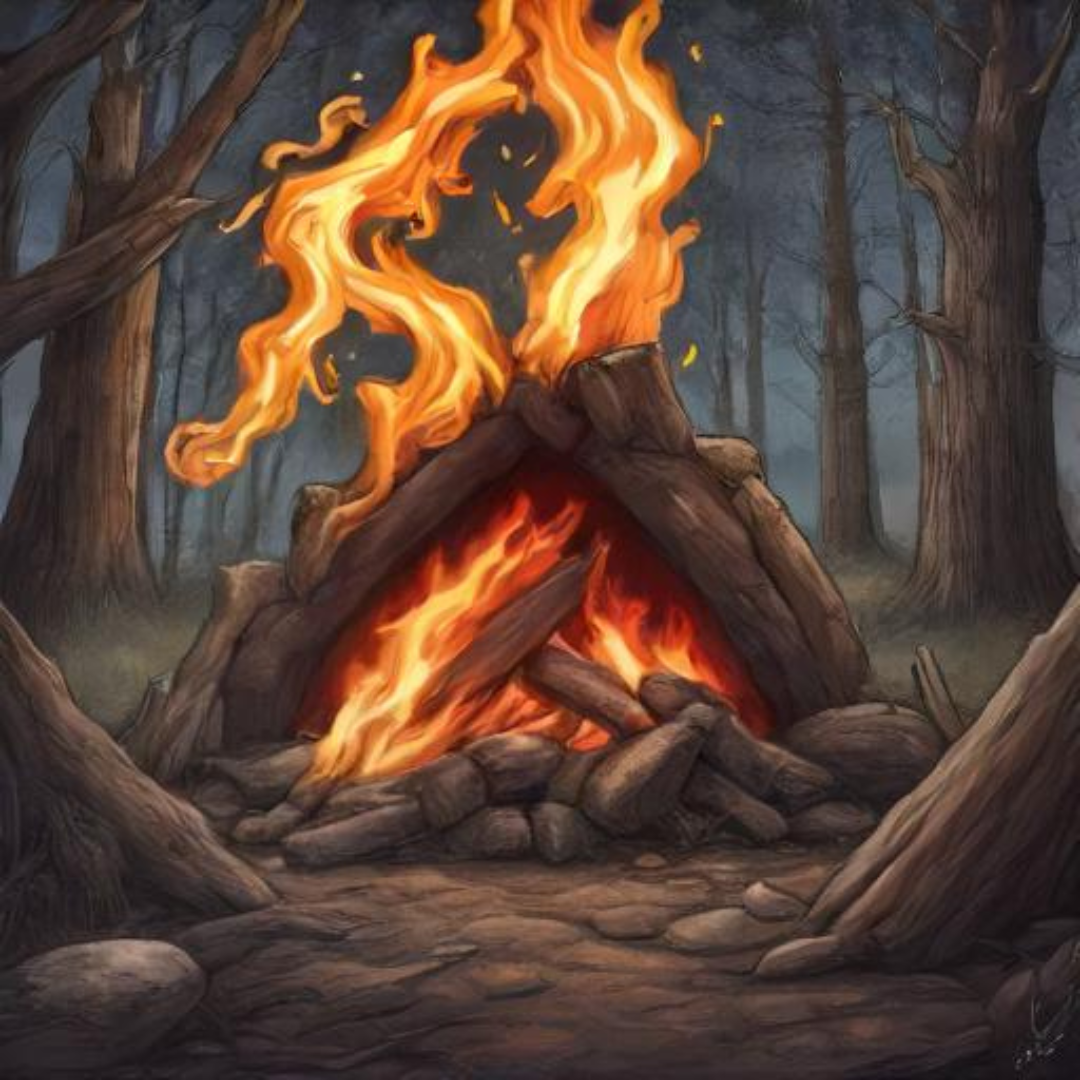
- Campfire: Start with a warm, orange base and layer yellows and reds on top. Use irregular brush strokes to create a flickering effect. Add blue tones near the base for depth. Don’t forget to include glowing embers and wisps of smoke.
- Torch: Torch flames are typically more controlled and elongated. Use a teardrop shape as your base, with a bright yellow core surrounded by orange and red. Add a subtle blue outline for contrast. Remember to include some trailing smoke at the top.
- Explosion: Explosions require a more dynamic approach. Start with a bright white or yellow center, then build outward with oranges and reds. Use radial brushes to create a burst effect. Add darker colors at the edges to represent smoke and debris. Incorporate flying embers and shock waves for added impact.
Animating Fire In Digital Art
Bringing your fire to life through animation can create stunning results. Here are some tips to get started:
- Frame-by-frame: Create keyframes for the main stages of your fire’s movement. Then, draw intermediate frames to smooth out the animation. Focus on the natural flickering and undulation of flames.
- Particle systems: Many digital art programs offer particle systems that can simulate fire behavior. Experiment with settings like emission rate, particle size, and lifespan to achieve the desired effect.
- Layer effects: Use layer effects like “Outer Glow” or “Inner Glow” and animate their properties over time. This can create a pulsing effect that mimics the natural ebb and flow of fire.
- Blend modes: Experiment with different blend modes on your fire layers. “Screen” and “Add” can create a glowing effect, while “Overlay” can help integrate the fire with its surroundings.
Remember, observing real fire behavior is crucial for creating convincing digital fire art. Study videos of various fire types and pay attention to how they move, change color and interact with their environment. With practice and these advanced techniques, you’ll be creating mesmerizing fire artwork that truly captivates your audience.
As you continue to refine your skills, don’t be afraid to experiment and develop your own unique style. Fire is a dynamic and versatile element that offers endless possibilities for creative expression in digital art.
Tips for Improving Your Digital Fire Drawing Skills
As digital artists, we’re always looking for ways to improve our skills and create more captivating artwork. When it comes to drawing fire, there are several techniques you can employ to enhance your abilities and bring your fiery creations to life. Let’s explore some valuable tips that will help you master the art of digital fire drawing.
Studying Real Fire References
One of the most effective ways to improve your fire drawing skills is by observing and studying real fire references. While it’s not advisable to start a bonfire in your studio, you can find plenty of high-quality fire videos and images online. Pay close attention to the movement, colors, and shapes of the flames. Notice how the fire behaves in different environments and conditions. By immersing yourself in these references, you’ll develop a better understanding of fire’s natural characteristics, which will translate into more authentic digital renderings.
Practicing Different Fire Styles
Fire comes in many forms, from small candle flames to raging infernos. To become a versatile digital artist, it’s crucial to practice drawing various fire styles. Start with simple, controlled flames and gradually work your way up to more complex and dynamic fire scenes. Experiment with different brush techniques to capture the essence of each fire type. For instance, you might use soft, blended strokes for a gentle campfire, while opting for more aggressive, jagged brushwork for an explosive fireball. The more styles you master, the more adaptable your fire drawing skills will become.
Experimenting with Color Palettes
Fire is known for its vibrant and warm colors, but don’t limit yourself to just oranges and reds. Expand your palette to include yellows, blues, purples, and even greens, depending on the type of fire you’re depicting. Play with color temperature and saturation to create depth and intensity in your flames. Try creating custom brushes or using blend modes to achieve unique color effects. Remember, the colors you choose can greatly impact the mood and atmosphere of your fire artwork, so don’t be afraid to push the boundaries and create eye-catching color combinations.
Seeking Feedback and Critiques
As with any artistic endeavor, receiving constructive feedback is invaluable for growth. Share your fire drawings with fellow artists, join online art communities, or participate in digital art workshops. Fresh perspectives can help you identify areas for improvement that you might have overlooked. Be open to criticism and use it as a tool for refining your techniques.
Additionally, don’t hesitate to ask specific questions about aspects of your fire drawings that you find challenging. The digital art community is often supportive and eager to help fellow creators improve their craft.
By incorporating these tips into your practice routine, you’ll steadily enhance your digital fire drawing skills. Remember that improvement takes time and patience, so don’t get discouraged if you don’t see immediate results. Keep experimenting, stay curious, and most importantly, enjoy the process of bringing fiery creations to life on your digital canvas. With dedication and consistent practice, you’ll soon find yourself creating stunning fire artwork that ignites the imagination of your audience.
Conclusion
As we wrap up our project of drawing fire digitally, remember that mastering this skill is all about practice and patience. We’ve covered the essentials, from understanding fire’s basic properties to exploring advanced techniques for creating realistic flames. Whether you’re using specialized software or your favorite digital art tools, the key is to experiment and find what works best for you.
Don’t be discouraged if your first attempts don’t look exactly like you imagined. Every artist at Artistic Trio Studio has been there, and we can assure you that with time and dedication, your digital fire artwork will improve. Keep refining your techniques, play with different brushes and colors, and don’t be afraid to push the boundaries of your creativity.
We encourage you to share your fire drawings with us and the community. Your unique perspective might just inspire someone else on their artistic journey. Remember, every great digital artist started somewhere, and with each flame you draw, you’re one step closer to mastering the art of digital fire. So, grab your stylus, fire up your imagination, and let your creativity burn bright!
Stay Inspired,
Darien